http://localhost/posFor hosting server installation navigate to your sub domain which you have created while installation.In our case it is
https://medixv4.spantiklab.comIf everything is good you will be able to see the app installation screen as shown in the ref image below :

Fill out all the given fields and click install.
After installation you will be redirected to the login screen.Login with the user email and password you just created while installing the app.
Step 1 : Setting Taxes
After logging inside the app from the menu go to Initialization / Branches page. You can see the newly created store there.Click on edit button
A popup will appear with the store details .Fill out the missing fields, The important thing here is the taxes that you required to setup
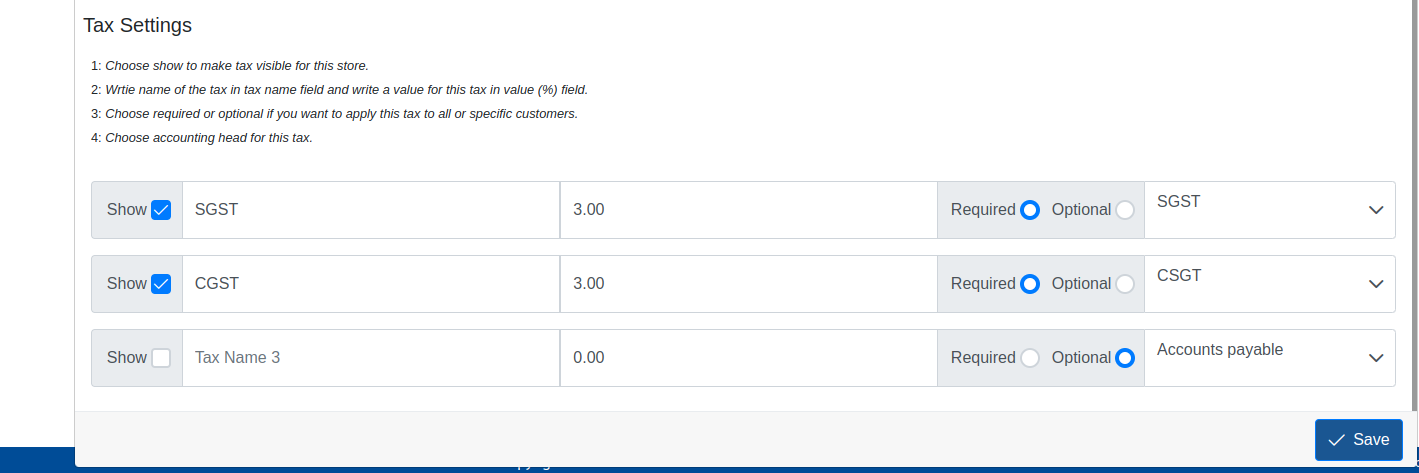
In this case we have 2 taxes SGST and CGST each is 6% and both are required.
Set the taxes according to your need.Important thing here is check the show checkbox otherwise i wont be selected.
Required and Optional radio buttons you see is also important here. Choose required when you want to apply this tax for all customers,Choose optional when you want to apply this for only specific customer.
Next to Required/Optional radio button there is a dropdown for accounting head,This is very important here for passing financial entry against the taxes.
You can create a new accounting head from the Chart of Account option from Initialization menu.Go a head and create a new one or edit the existing ones.
Step 2 : Setting Bank Accounts
After Taxes its time to setup your bank account from which your store perform bushiness.
Note: Setting the bank account is important if you want to use Multi Payment method like Debit or Credit Cards.From Initialization menu go to the Banks and click on the Plus button to add a new bank account
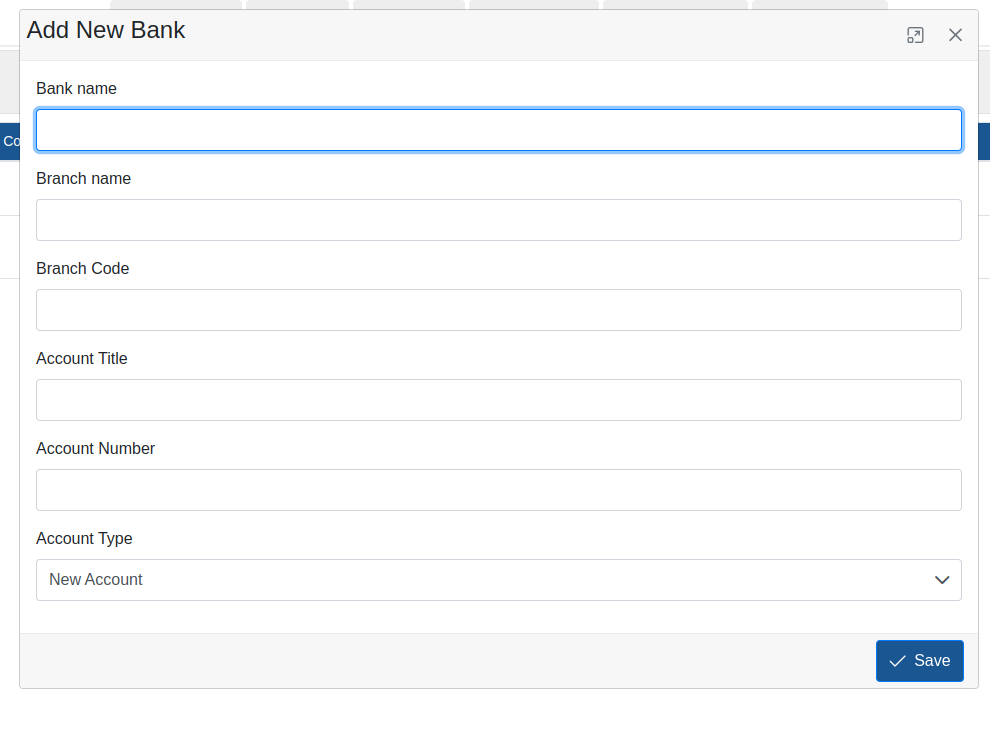
Fill out all the required fields.The important thing here is the account type.If you already have balance in your account the choose Existing Account from the menu Choose the date and enter the amount of balance you have in this bank account till this date amd click Save.
Step 3 : Setting Payment Methods
After Creating Bank account its time to create a Payment methods you deal with.From the Initialization menu choose Payment Methods option,Click in Plus button.
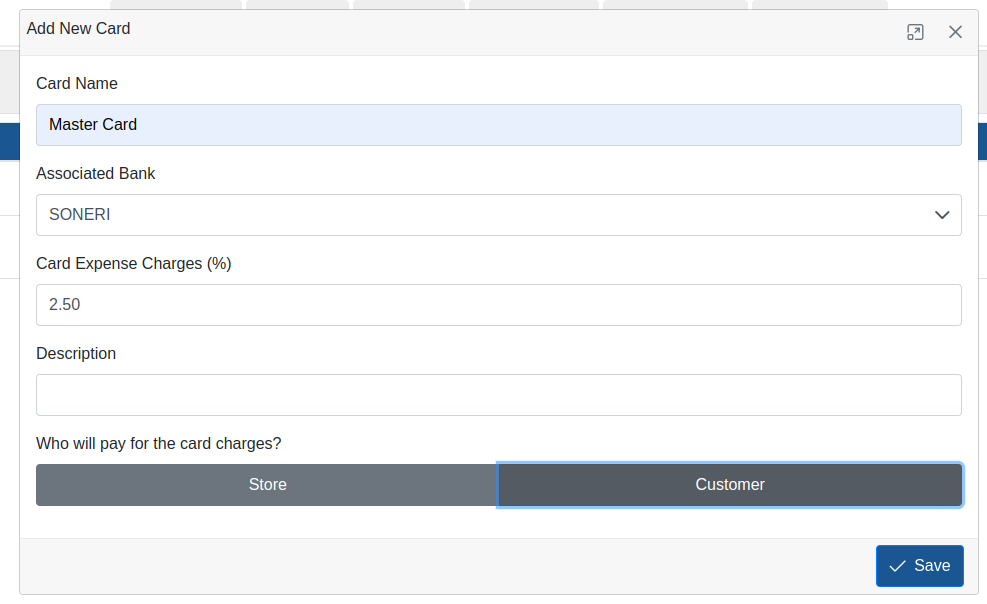
Fill out all the required fields. Choose the bank account where these payments will go.If you are charging the card expenses of bank from customer then choose customer, Card expenses will be automatically be added to your customers bill.
For Further details about the app read the Documentation section